Series: No-Neutral Smart Switches | Article 6/10 | Slug: sonoff-zbmini-l2-zigbee-zha-z2m-antenna-bindings | Focus: ZHA vs Z2M, external antenna, binding groups, coordinator placement
By Nora Thorne // IoT Architect & Smart Home Systems Specialist
SONOFF ZBMINI-L2 — The Zigbee 3.0 No-Neutral Relay
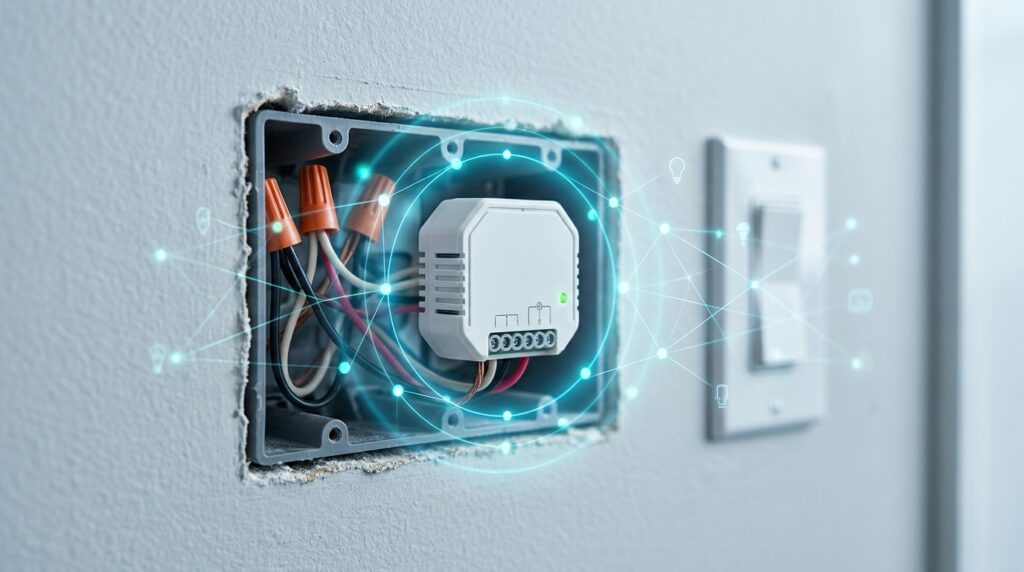
The SONOFF ZBMINI-L2 is the device that makes the no-neutral problem look almost embarrassingly easy, if you are willing to accept what a Zigbee relay is. It is a mains-powered, single-channel Zigbee 3.0 smart switch rated at 6A that sits in the wall box behind an ordinary rocker, draws its power from the load it is switching, and needs no neutral wire at the switch at all. That last clause is the whole point of the “L2” — the original ZBMINI family is where SONOFF proved the concept, and the L2 is the refined, tiny, wall-box-native form factor.
Where the Shelly 1L (article 5) brought Wi-Fi, MQTT, and a scripting engine into the no-neutral corner, the ZBMINI-L2 takes the opposite route. It is a pure Zigbee device. No Wi-Fi SSID, no broker, no cloud, no local MQTT topic to babysit. It speaks the 2.4 GHz Zigbee 3.0 radio directly to your coordinator, and it inherits everything the mesh gives it: multi-hop routing, local control, and the ability to keep working when Home Assistant is down — provided you wire the dumb switch and set up bindings correctly. That is the trade you are making by choosing SONOFF over Shelly here: you give up Wi-Fi’s range and scripting headroom, and you gain a protocol that is genuinely local-first and mesh-capable.
Key Specifications
| Attribute | Value |
|---|---|
| Model | SONOFF ZBMINI-L2 (Zigbee 3.0, no-neutral) |
| Neutral required? | No — powered from the switched load |
| Channels | 1 (single relay) |
| Rating | 100–240V AC, 50/60 Hz, 6A max |
| Max load | 720 W resistive @ 120V / 1380 W @ 230V; 150 W LED @ 120V / 300 W LED @ 230V |
| Low-load floor | Works down to ~3 W LED without an anti-flicker module |
| External switch | Yes — rocker (factory default) or push-button, on S1/S2 |
| Radio | Zigbee 3.0 (ZBOSS/EFR32MG22-class MCU) |
| Mesh role | Router (mains-powered — can forward traffic) |
| Size / weight | 39.5 × 32 × 18.4 mm / 22 g |
| Casing | PC, V0 fire rating |
| Price band | ~$11–15 |
The two numbers that matter most for a no-neutral install are the 6A rating and the ~3 W low-load floor. The 6A ceiling means it comfortably handles a lighting circuit but is not a general-purpose mains relay for heavy appliances. The 3 W floor means a single modern LED bulb is a valid load — no bypass capacitor, no anti-flicker module bolted across the fitting — which is the exact failure mode that keeps haunting cheaper no-neutral modules with high-wattage minimums.
How It Powers Itself Without a Neutral
The ZBMINI-L2 does not have a neutral to draw power from, because the switch box it lives in has one. Instead it draws current through the load it is controlling. When the relay is off, a small trickle flows through the bulb (or its driver) to keep the radio and MCU alive; when it is on, the full load current flows. This is the same principle every no-neutral module uses, and it is why the device is always specified with a minimum load — too small a load and the trickle is not enough to keep the device powered, or (in the worst case) the load glows faintly when it should be off.
Permanent live (from the feed)
   |
   +---- L IN  (ZBMINI-L2 input)
   |
   |    [ relay ]
   |
L OUT ---- switched live ----> to the light / fixture
   |
S1 ---- common of the dumb rocker
S2 ---- L1 (load side) of the dumb rocker

The relay sits where the rocker used to break the circuit.
The dumb rocker no longer carries the lighting load — it only
tells the relay to toggle, through S1 and S2.
ZHA vs Zigbee2MQTT — Choosing Your Home Assistant Backend
The ZBMINI-L2 pairs cleanly with both of Home Assistant’s Zigbee integrations, so the choice is architectural, not a matter of device support. Both integrations drive the coordinator, talk to the same Zigbee network, and expose the device as a Home Assistant entity. Where they differ is in how much of the Zigbee layer they hand you, and how they store and expose network state.
| Dimension | ZHA | Zigbee2MQTT |
|---|---|---|
| Implementation | Native to Home Assistant (zigpy + ZHA) | External service (MQTT bridge + coordinator firmware) |
| Coordinator firmware | ZBOSS (via zigpy) | EZSP, ZBOSS, or ZNP (per dongle) |
| Config storage | Home Assistant database | configuration.yaml + network_map.json |
| Network map | Internal, via Zigbee | Explicit, inspectable network_map.json |
| Binding / groups | ZHA bindings UI + groups | MQTT bridge requests + groups: block |
| Device discovery to HA | Direct (integrated) | Via MQTT discovery (seamless in recent versions) |
| Failure mode | Integration restart, network rebuild | Bridge restart; Zigbee network survives independently |
| Tuning surface | Less exposed | Very exposed (per-device, per-endpoint) |
| Maturity feel | Integrated, “it just works” | Powerful, “you can reach into it” |
ZHA is the path of least resistance. It ships with Home Assistant, shares its state database, and exposes binding and group management directly in the UI. For a small to medium network where you want the coordinator to be “just part of HA,” ZHA is the sensible default. Its recent versions have closed most of the gaps that made people reach for Z2M historically.
Zigbee2MQTT is the path of maximum control. It runs as a separate service, speaks to Home Assistant over MQTT discovery, and gives you an explicit network_map.json you can read and reason about. That matters the moment your network grows past a few dozen devices or you start doing custom binding and group work — the explicit, file-based model is dramatically easier to audit, back up, and restore than an opaque database. Z2M also keeps the Zigbee network alive independently of the bridge: if the bridge crashes, your bound devices keep talking to each other and to the coordinator.
For this specific article’s focus — binding groups and external antenna placement — Z2M has a small edge, because the binding and group primitives map one-to-one onto the MQTT bridge API you can script and inspect. But ZHA can do everything in the article too; the choice should be driven by your overall network size and how much you want to reach into the protocol.
The External Antenna Question
This is where the ZBMINI-L2’s Zigbee nature diverges sharply from the Wi-Fi Shelly 1L. Wi-Fi has a range problem you solve with mesh points and VLANs. Zigbee’s range is a topology problem you solve with coordinator placement and routers.
The single most common Zigbee mistake is plugging the coordinator dongle into a USB port at the back of a rack, behind a metal case, on the far side of a 2.4 GHz router. Zigbee’s 2.4 GHz channel is shared with Wi-Fi, and the radio is a half-duplex, low-power link. A badly placed coordinator is the root cause of more “my Zigbee device is flaky” reports than any device firmware bug.
The external antenna is the physical fix, and it is genuinely worth having for a home with more than a handful of Zigbee devices, especially if the coordinator is in an enclosure. The antenna does not extend range by magic — it improves the link budget and, more importantly, the directivity of the radio so the coordinator can hear devices in the walls. In practice:
- Coordinated placement: Put the coordinator as close to the center of your Zigbee device distribution as you can, in an open spot, not inside a metal case. If it is in a case, use a long USB extension (see below) and put the dongle on the outside.
- USB extension, not a short cable: A short, tightly coiled USB cable next to a power supply is a Faraday cage and a noise source. A 1–2 m USB 2.0 extension, run along a wall and finished in the open, is the standard recommendation. USB 3.0 ports emit 2.4 GHz noise that degrades Zigbee — prefer a USB 2.0 port, or add a ferrite bead, when you can.
- Antenna orientation: If your dongle or an add-on has a detachable antenna, point it toward the mass of your devices. A vertical orientation covers a horizontal plane of devices; a horizontal one covers a vertical stack. In a typical single-floor home, vertical is the safer default.
- Channel planning: Zigbee and Wi-Fi both live in 2.4 GHz. The cleanest mitigation is to put your 2.4 GHz Wi-Fi on channels 1, 6, or 11 and keep Zigbee on one of channels 15, 20, or 25 (the three “clean” Zigbee channels that do not overlap the Wi-Fi 2.4 GHz channels). If you are seeing intermittent drops, this channel separation is often the highest-leverage single change you can make.
Coordinator placement checklist
  [ ] Dongle in an open location, not inside a metal case
  [ ] Long USB extension (1-2 m), not a short coiled cable
  [ ] USB 2.0 port preferred; add ferrite bead if 3.0
  [ ] 2.4 GHz Wi-Fi on ch 1/6/11, Zigbee on ch 15/20/25
  [ ] Antenna vertical (default) or pointed at device mass
  [ ] Routers (mains devices like the ZBMINI-L2) distributed
        as a mesh, not clustered near the coordinator

Why a mains-powered ZBMINI-L2 is a router:
  It is always powered, so it can forward traffic for battery
  devices (sensors, remotes) that sit behind it. One ZBMINI-L2
  per room is the cheapest, most reliable mesh expansion you
  can buy.
The last point is the quiet win of the ZBMINI-L2 over a battery no-neutral option: because it is mains-powered, it is a Zigbee router, not just an end device. Every one you install is a potential relay for your battery sensors and remotes. In a house where your Zigbee network is thin on routers, adding ZBMINI-L2 relays at the switch boxes is the single most effective mesh-repair move available — and it is free, because you are buying them anyway for the lights.
Binding Groups — Local, Hub-Independent Control
Binding is the feature that makes Zigbee more than “another Wi-Fi device.” A binding is a direct link between two Zigbee devices: a source (a switch, remote, or relay) and a target (a bulb, relay, or a group). Once bound, the source can command the target without any message touching the coordinator, the bridge, or Home Assistant. That gives you two things you cannot get from a cloud or Wi-Fi architecture:
- Speed. The command travels radio-direct. No MQTT round-trip, no HA event loop. For dimming feedback, this is the difference between “it works” and “it feels instant.”
- Resilience. If the coordinator drops, the bridge restarts, or Home Assistant is down for an update, bound devices keep working. The wall switch still toggles the light. That is the “it still works when the smart home is down” property that Zigbee is famous for.
A binding group generalizes this: instead of one source pointing at one device, the source points at a group — a named set of device endpoints that all respond to one broadcast command. One command, N relays, one radio transmission, and the coordinator is never in the loop.
How a Zigbee Group Actually Works
The important mental model: a group is a broadcast address, not a server-side list. When you “add a device to a group,” you are not telling the coordinator to remember the membership — you are telling that device to remember it. Each device stores its own group-membership table. When a group command is broadcast on the air, every device hears it and checks its local table: “am I in this group?” If yes, it executes; if no, it ignores it.
That has three consequences worth internalizing:
- Membership is per-device, not global. The coordinator has no authoritative group list. You manage membership by sending each device the “add me to group X” command.
- A group command is a single broadcast. One air transmission, N devices acting. This is far cheaper on the network than N unicast commands from the bridge.
- Groups are the unit of local control. Bind a wall switch or a remote to a group, and that switch controls the whole group locally, forever, independent of software.
Setting Up a Binding Group in Zigbee2MQTT
In Z2M the primitives are clean and scriptable. You (a) create a group, (b) add the member devices to it, and (c) bind a source device to the group. Everything below can be done in the Z2M frontend, but the MQTT form is what you want for reproducibility.
# 1. Create the group (in configuration.yaml, or via the frontend)
groups:
  '1':
    friendly_name: living_room_lights
    retain: false
    transition: 2          # seconds, for dimming
    optimistic: true       # group state tracks member changes

# 2. Add the ZBMINI-L2 relays to the group (one message per device)
topic:   zigbee2mqtt/bridge/request/group/members/add
payload: { "group": "living_room_lights", "device": "kitchen_island" }
payload: { "group": "living_room_lights", "device": "dining_table" }

# 3. Bind a source (e.g. a wall remote or another relay) to the group
topic:   zigbee2mqtt/bridge/request/device/bind
payload: { "from": "hallway_remote", "to": "living_room_lights" }

# 4. Drive the whole group with one command
topic:   zigbee2mqtt/living_room_lights/set
payload: { "state": "ON" }
Two Z2M gotchas that bite people:
- When binding to a group, use the group’s
friendly_name, not the numeric group ID. The MQTTdevice/bindtarget must be the name, or the bind silently does nothing. - Reporting is auto-configured on bind. When you bind a source to a target, Z2M sets up reporting so the target reports state changes back to the source. If you are binding to a device that does not natively support reporting, put it in a group and bind the source to the group instead — Z2M will poll the group for updates.
Setting Up a Binding Group in ZHA
ZHA exposes the same Zigbee primitives through its UI. The workflow is:
- In Settings → Devices, select the source device (your relay or remote).
- Open its bindings (or “scenes/binding”) panel.
- Add a group as the destination: either create a new group or select an existing one.
- Add the target relays to that group (each ZBMINI-L2 is added as a group member via its device page).
- Pick the clusters to bind — for a relay you want
genOnOffand, if you are dimming,genLevelCtrl.
The practical difference from Z2M: in ZHA the group-membership and binding state is stored in the Home Assistant database rather than a flat file, so you reason about it through the UI and the HA state machine rather than network_map.json. For a handful of groups that is fine; for a large, frequently-audited network, Z2M’s file model is easier to back up and diff.
Which to Bind to: a Single Device or a Group?
- Two devices (one relay controlling one bulb): bind them directly. Simpler, fewer moving parts.
- Three or more devices (a relay or remote controlling several bulbs/relays): use a group. One bind, one broadcast, one point of control. This is the pattern for “kitchen lights,” “bath lights,” “evening scene,” etc.
- A no-neutral relay as the source: The ZBMINI-L2’s external switch (S1/S2) can be the source of a binding — press the dumb rocker and it commands the group locally. That is the cleanest “physical switch still works after HA dies” setup you can build.
The ZBMINI-L2 is, in other words, a dual-purpose node: a target (a light you control) and a source (a switch you bind to a group). That duality is what makes it the workhorse of a local-first Zigbee home.
Wiring the ZBMINI-L2 — No-Neutral, in Practice
The ZBMINI-L2 is a 2-channel no-neutral (2-wire) relay. The “L2” in the name refers to the two independent loads it can drive. The critical constraint that every no-neutral relay shares: it cannot create power from nothing. A no-neutral circuit has only line (L) and the load return. The relay must take a small bleed current from the load side to power its own radio and logic, which is why a minimum load is mandatory.
Minimum load: The ZBMINI-L2 needs a real minimum load on each channel it drives — typically in the 3–5 W range per channel for incandescent/halogen, and a higher effective load for LED (many low-wattage LED strings sit below the minimum and will cause flicker or the relay to drop out). This is the single most common failure mode of no-neutral retrofits: a 2 W LED strip that the relay cannot hold. If you are retrofitting a circuit with very low-wattage LED lighting, verify the load against the datasheet minimum before you wire it — or add a dummy load.
The two channels: Each channel is a relay contact you can map to an independent source. The ZBMINI-L2 exposes the source inputs (S1/S2 and the associated L1/L2 loads) so you can:
- Run two separate lights off one enclosure (e.g. a vanity light + an under-cabinet light on one 2-gang box).
- Run one light and use the second channel as a bypass/dummy or a second source, depending on your box layout.
Because there is no neutral to feed the relay’s logic from a clean source, the relay is powered through the load. That means the minimum-load requirement is not optional and not a suggestion — it is the electrical basis of the whole device.
Practical wiring notes:
- Identify your line (L) — the hot. The ZBMINI-L2 is a line-side device: it sits between line and load, not on the neutral.
- Keep your load side clean. If the box also carries a neutral (some “no-neutral” boxes actually have one you are choosing not to use), you can wire the relay’s power feed from that neutral for a more robust power path — but the ZBMINI-L2 is designed for the 2-wire case, so treat the no-neutral path as the primary design.
- The external switch inputs (S1/S2) are what you bind to groups or use as local sources. Wire your existing rocker switch to the S input so it continues to work as a local toggle and as a binding source.
- Heat and derating: The relay bleeds current through the load. In a tightly packed box with multiple relays, allow for the extra heat and do not pack the box beyond its fill rating.
The honest caveat on no-neutral: A no-neutral relay is a retrofit, not a free lunch. It solves the “no wire in the box” problem but trades it against a minimum-load requirement and a load-side power path. If you are doing new construction or a full rewiring, a neutral is almost always the better electrical choice. The ZBMINI-L2 earns its keep in the existing-home retrofit where pulling a neutral is not an option.
Building It Out: A Reference Topology
A small, concrete, local-first topology that uses every capability in this article:
[ Zigbee Coordinator ]
   (external antenna, USB 2.0, open location, ch 15/20/25)
        |
        |  (Zigbee 2.4 GHz, mesh)
        |
   [ ZBMINI-L2 #1  ]  -- router, mains-powered
   [ ZBMINI-L2 #2  ]  -- router, mains-powered
   [ ZBMINI-L2 #3  ]  -- router, mains-powered
        |
   (group "kitchen_lights" = #1 + #2)
   (group "bath_lights"    = #3)
        |
   [ Wall remote / S1-S2 source ]  -- bound to both groups locally
        |
   (Home Assistant / Z2M bridge watches the network,
    exposes HA entities, and is NOT in the local command path)
Why this holds together:
- Routers everywhere: All three ZBMINI-L2s are mains-powered routers, so any battery sensor (door, motion) anywhere in the house can route through the nearest one. The mesh is dense by construction, not by luck.
- Groups for multi-light zones:
kitchen_lights(two relays) andbath_lights(one relay) are each a single broadcast address. One command, whole zone, coordinator-free. - Local source: The wall remote / S1-S2 inputs are bound to both groups, so the physical switch works even if the bridge and Home Assistant are both down.
- Coordinator placement: The antenna + open location + channel separation keep the radio link clean, which is what the mesh and the groups are built on top of.
Bottom Line for Article 6/10
The SONOFF ZBMINI-L2 is the no-neutral workhorse for a local-first Zigbee home. It pairs with either ZHA or Zigbee2MQTT — pick ZHA for integrated simplicity, Z2M for scriptable, file-backed control. Its mains power makes it a Zigbee router, so each unit is both a controllable light and a free mesh relay. And because it is a Zigbee device, it supports binding groups — the one feature that gives you hub-independent, instant, resilient local control, which is the whole point of moving away from a cloud switch.
For the next article in the No-Neutral series we will cover the final device and the complete 10-piece lineup, and close out the series with a consolidated buying guide.
End of Article 6/10 — SONOFF ZBMINI-L2 Zigbee Deep Dive.